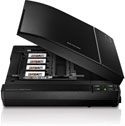
Scanning Slides with a Slide ScannerSlides used to be one of the most popular ways of showing off holiday snaps or other photographs of a wider appeal. With most people heading into the digital age though, many have tried to scan their old slides onto computers, a process which can often be disappointing without having first read some tips on scanning slides. Let There Be Light Getting Started If a TMA is part of the scanner's specifications then the actual process of scanning transparencies is not over-complicated. The first step is to ensure that the scanner's glass is clean to prevent any distortions or disruptions to the quality of the final image. A lint-free cloth sprayed with a mild variety of glass cleaner is usually best for this job. Choose Your Resolution The resolution at which the images are being scanned is another factor to consider. If images are to be expanded or blown up in any way then details can be lost if images are not scanned at a high enough resolution. In fact, scanning slides, negatives or film will likely be the only time you need to use the maximum resolution of a film scanner. If you think of resolution as an enlargement value then you can understand that a small object will require more enlargement and therefore more resolution. The scanning of an old image can present the chance to restore it to former glories, with photo software allowing for colors to be reinvigorated and images sharpened. This is a good idea if the images are going to be presented in public or beyond the immediate circle of friends and family, or if images have spent a lengthy period of time in storage conditions which have been less than perfect. Hopefully these tips will help you get started with your own slide scanning. Using a slide and negative scanner isn't easy if you are new to the process, but a little effort will get the job done and bring you some peace of mind that all of your memories are better preserved. |
|
